Fn Key Stuck on Lenovo Laptop
As a long-time Lenovo laptop user, I rely heavily on the Fn key to access special functions and shortcuts. So when my Fn key got stuck unexpectedly, I was totally stumped. Pressing it had no effect while using keyboard shortcuts became impossible. After some trial and error, I learned the Fn key can get stuck due to both hardware and software issues. Hardware problems involve physical jamming due to dust or damage. Software sticking happens when Fn lock gets enabled accidentally. In this guide, I will walk you through the troubleshooting steps I followed to get my Lenovo’s Fn key working again. Read on to learn how to unlock stuck Function keys due to mechanical failures or incorrect laptop settings.

Why is the Fn aka Function Key is Stuck on My Lenovo Laptop?
There could be a few reasons why your Lenovo laptop’s Fn key is stuck or not working properly:
Dust and Debris
Dust, crumbs, lint, and other debris can collect under the key over time. This debris can block the key from coming back up after being pressed, causing it to remain stuck in the down position.
Sticky Beverage Spillage
Accidental spills like coffee, soda, or juice can leave a sticky residue under the keycap. As the liquid dries, it creates gunk that can jam the key mechanism.
Faulty Key Switch
The plastic scissor mechanism under the keycap consists of a silicone rubber dome switch. This switch can get damaged or displaced over time, preventing the key from springing back up.
Enabled Through Software
Sometimes, the Fn lock functionality may get enabled in your Lenovo laptop’s BIOS or keyboard software. This will make the Fn key behave like it is physically held down until you disable this setting.
Now that you know why the problem occurs, let’s move on to solutions to unstick the stubborn Fn key!
What to Do If the Key is Physically Stuck?
If your Lenovo laptop’s Fn key is stuck down and does not pop back up when pressed, try the following solutions. Note – before performing any steps below, ensure the laptop is shut down and disconnected from the power supply for safety.
Clean the Keycap
Dirt, debris, or spills under the keycap can make it stick. Carefully cleaning the Fn keycap can fix this issue:
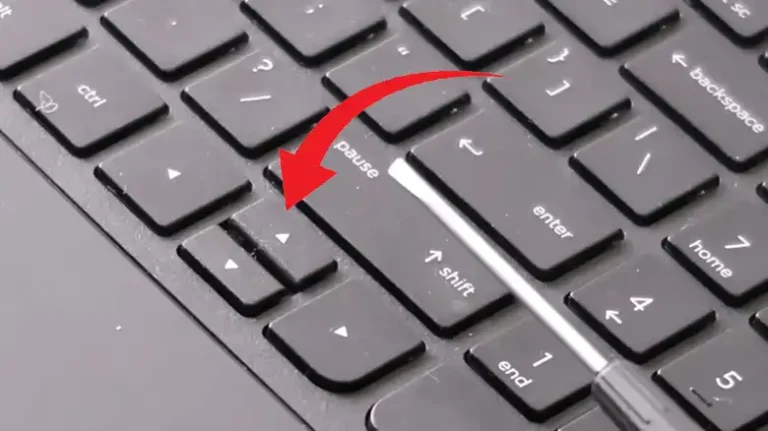
- Step 1 – Identify the stuck Fn key and gently pry the keycap loose using a keycap puller tool. This can be easily purchased online. Be careful not to break the keycap or internal stems.
- Step 2 – Use a can of compressed air to blow out any dust, lint, or crumbs trapped under the Fn key. Also, spray and clean the exposed keyboard section.
- Step 3 – Dampen a cotton swab with isopropyl rubbing alcohol and gently clean around the Fn key to dissolve any sticky residue. Repeat with additional swabs until the area is fully cleaned.
- Step 4 – Allow the Fn key area to fully dry for at least 30 minutes before reattaching the keycap.
- Step 5 – Once fully dry, firmly press down on the keycap to lock it back in place. You will hear a click when it attaches.
- Step 6 – Reboot the laptop and check if the Fn key is now working properly without sticking.
Check the Stem Underneath the Key
The keycap is mounted on a plastic stem which gets pressed down when you type the key. An internal rubber dome switch underneath provides the spring action to push the key back up. Damage or misalignment of this stem or switch can cause stuck keys. To check:
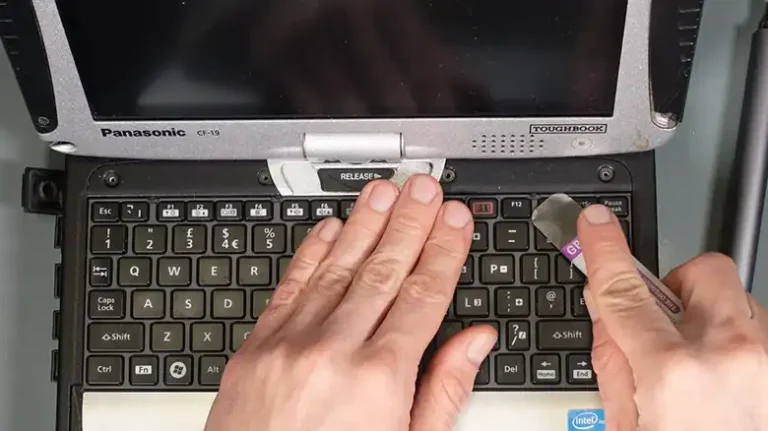
- Step 1 – Thoroughly clean the keycap area with compressed air as explained in the previous section.
- Step 2 – Carefully remove the keycap using a keycap puller to expose the stem. Observe the stem for any cracks or misalignment. If damaged, the Fn key mechanism will need replacing.
- Step 3 – The stem should be straight and properly centered over the mounted rubber dome switch. If out of alignment, try gently adjusting or replacing the stem.
- Step 4 – Put back the keycap firmly once the stem is fixed and test for normal functioning. Do not force badly damaged stems to avoid breaking the laptop’s internal components.
Replace the Keycap
In case thorough cleaning or stem adjustments do not resolve your stuck Fn key issue, replace the defective keycap:
- Step 1 – If the keycap is damaged or cracked, you may need to replace it. Replacement keycaps are readily available online or at computer stores.
- Step 2 – Make sure you get the correct keycap for your specific Lenovo laptop model.
- Step 3 – To replace the keycap, gently pry it off with a flat-head screwdriver or your fingernail. Be careful not to damage the stem underneath.
- Step 4 – Snap the new keycap onto the stem and press it down firmly until it clicks into place.
Get in Touch with Lenovo Customer Support
As an alternative to DIY keyboard repairs, consider availing Lenovo’s exceptional customer service and support options:
Call the Lenovo helpline or initiate a live chat session to get expert troubleshooting assistance. Trained technicians can diagnose the issue and provide the safest fixed approach for your particular laptop configuration. If hardware damage/replacement is required, they can guide you to Lenovo-authorized service centers closest to your location equipped with genuine spare parts and qualified engineers.
Getting professional support can not only swiftly fix your keyboard issues but also ensure your laptop warranty terms are upheld.
What If the Fn Key isn’t Physically Stuck?
Sometimes the Fn key may seem stuck even when not physically jammed. This happens when the Fn lock gets enabled accidentally through software settings. Fixing these settings can resolve such a virtually stuck key.
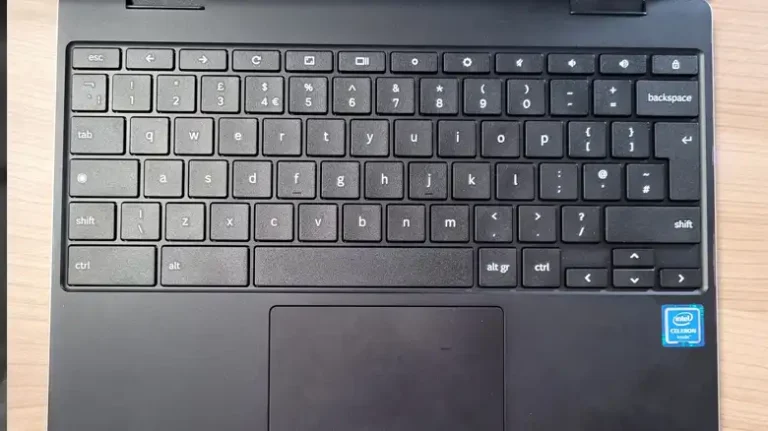
Unlock the Function Key
This is like finding the spare key under the couch cushion. Press and hold the Fn key and the Esc key at the same time. Presto! Your Fn key might just be locked in Fn Lock mode, and this simple combo could be the ticket back to normality.
Disable Fn Key from BIOS
Boot up your Lenovo and press F1 repeatedly as soon as the screen flickers to life. This keystroke timing can be tricky, so be quick!
- Once inside the BIOS, navigate through the menus (usually using arrow keys and Enter) until you find options like Action Keys Mode, Function Key Mode, or Fn Lock. They might be hiding in System Configuration, Keyboard Settings, or Advanced Settings.
- Check if it’s set to Enabled. If so, switch it to Disabled and liberate those F keys!
- To save the change, press F10 to save the change and exit the BIOS. Then, give your laptop a good ol’ restart.
Flash the BIOS
Flashing the BIOS can be a delicate process, so it’s crucial to approach it with caution and proper preparation. Here’s a general guide to get you started:
- Download the BIOS update: Head to your motherboard manufacturer’s website and find the latest BIOS update file compatible with your specific model. Download it and save it to a USB flash drive formatted as FAT32.
- Backup your current BIOS (optional but recommended): Some utilities allow you to backup your current BIOS settings before flashing. This can be helpful if you need to revert to them in case of any issues.
- Enter the BIOS setup: This typically involves restarting your computer and pressing a specific key during the boot screen (e.g., F1, F2, Del). Refer to your motherboard manual for the exact key.
- Locate the flashing utility: Look for options like “BIOS Update,” “Flash BIOS,” or “EZ Flash.” Different BIOS interfaces vary, so consult your motherboard manual for specific instructions.
- Select the BIOS update file: Browse to the USB flash drive containing the downloaded file and select it.
- Start the flashing process: Confirm your choice to proceed with the flashing. This process usually takes a few minutes, and interrupting it can damage your motherboard, so ensure your computer has a stable power supply during this time.
- Exit the BIOS: Once the flashing is complete, the system will usually reboot automatically.
Uninstall the Keyboard Driver
Sometimes, due to a driver glitch, a key can be stuck on your Lenovo laptop and the Fn isn’t any different! So, you can give a try to reinstall the keyboard driver to fix this issue.
- Right-click the Start menu or press Win + X and select Device Manager.
- Expand the Keyboards category.
- Right-click your keyboard driver and select Uninstall device.
- Check the Delete the driver software for this device box if available and click “Uninstall.”
- Windows will attempt to automatically reinstall the driver upon restart.
To Summarize,
The Lenovo laptop’s Fn key may get stuck due to dust/damage affecting hardware or accidental enabling of the Fn lock through software.
If the key is physically stuck, cleaning and replacement can help resolve the issue. For virtual sticking, toggling the Fn lock or updating drivers/BIOS fixes the problem.
Stuck Function keys can certainly be annoying but following the appropriate troubleshooting steps will get your Lenovo keyboard back to normal in no time!
![[How to Fix] Control Key Stuck on Keyboard](https://keyboardhunter.com/wp-content/uploads/2023/10/Control-Key-Stuck-on-Keyboard-768x431.webp)
![[Fixed] Mini Keyboard Not Working with Android Box](https://keyboardhunter.com/wp-content/uploads/2023/10/Mini-Keyboard-Not-Working-with-Android-Box-768x431.webp)