[EXPLAINED] How to Pair Dell Wireless Keyboard with Receiver?
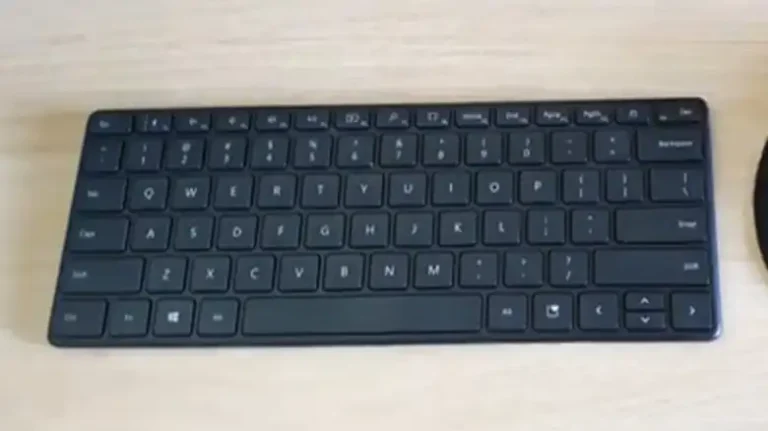
Dell wireless keyboards provide a convenient way to use your computer without messy cables. The keyboard connects wirelessly to a USB receiver that must be paired initially. This article will provide a step-by-step guide on pairing a Dell wireless keyboard and receiver, troubleshooting tips, frequently asked questions, and final thoughts on the process.
To make things more convenient, here’s a quick guidance – To pair a Dell wireless keyboard, ensure it’s powered on, plug in the receiver, and check the battery charge. Hold the Connect button on the keyboard to enter pairing mode. It should automatically connect; if not, add it to Windows Bluetooth settings. Once successfully paired, the status light becomes solid.
Now that you have an overall idea, let’s get into the detailed procedure, shall we?

Step-by-Step Pairing Guide
Your Dell wireless keyboard offers the freedom of a cable-free workspace. This informative guide simplifies the process of pairing your keyboard with its receiver, ensuring a smooth and effortless setup.
Step 1: Pre-Pairing Preparation
Before we dive into the pairing process, it’s important to make sure both your wireless keyboard and receiver are ready for setup.
- Ensure the wireless keyboard is powered on by pressing the power button.
- Plug the wireless receiver into an open USB port on your computer. This receiver is typically a small USB dongle that comes with the keyboard.
- Check that keyboard batteries have sufficient charge. Your keyboard must be ready to establish a connection.
Step 2: Initiating Pairing
Now, let’s initiate the pairing process.
- Press and hold the Connect button on the bottom of the keyboard for 5-10 seconds. This step puts the keyboard in pairing mode.
- The status light on the keyboard will start flashing rapidly, indicating that it’s ready to pair with the receiver.
Step 3: Completing the Pairing Process
The pairing process should happen automatically, but if it doesn’t, follow these steps –
- The keyboard should automatically pair with the receiver. When it does, you’ll notice the status light becomes solid, indicating a successful pairing.
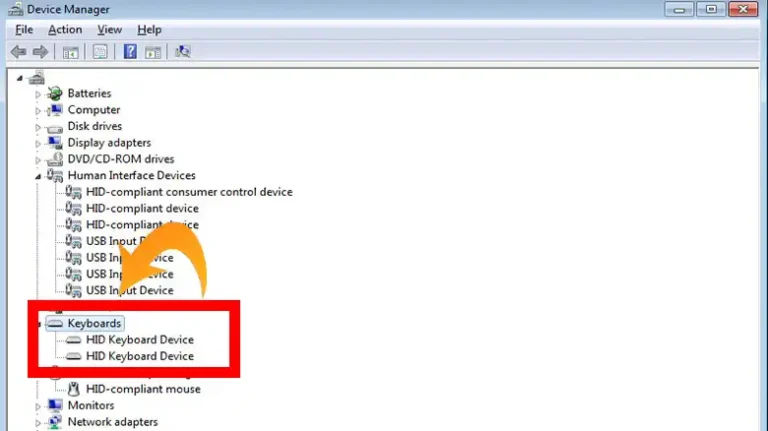
- If the keyboard and receiver don’t connect automatically, go to Windows Bluetooth settings and select Add Device. Look for the keyboard when it appears in the list of available devices. Windows will install any required drivers automatically.
Step 4: Finalizing Pairing
With the successful pairing of your Dell wireless keyboard and receiver, you’re almost ready to start using it. Confirm the pairing with the following steps:
- Once successfully paired, the status light will become solid.
- You can now start using the Dell wireless keyboard. Enjoy the freedom of cable-free typing!
Necessary Troubleshooting Tips
Keyboard not pairing?
If you encounter issues during the pairing process –
- Update keyboard firmware through Dell software.
- Try different USB ports, and avoid hubs that might interfere with the signal.
- Check for interference from other wireless devices that may disrupt the pairing process.
- If all else fails, you can delete and re-pair the keyboard to attempt the pairing process again.
Connection issues?
If you experience connection issues after pairing –
- Replace batteries if the charge is low to ensure a stable connection.
- If you suspect a damaged receiver, you may need to replace the receiver.
- For more complex issues, contact Dell Support for further assistance.
Frequently Asked Questions
How do I know when the keyboard is in pairing mode?
You can tell that the keyboard is in pairing mode when the status light on the keyboard flashes rapidly. This happens after pressing the Connect button for 5-10 seconds.
What do I do if the keyboard connects but some keys aren’t working?
If the keyboard connects but some keys aren’t working, try updating the keyboard drivers and firmware. If issues persist, there may be a hardware problem requiring keyboard replacement.
How can I switch the paired receiver with a new one?
That’s pretty simple! Delete the existing keyboard pairing in Windows. Then redo the pairing process with the new receiver as outlined in the initial pairing guide.
How far can the keyboard be from the receiver?
In ideal conditions, the keyboard can be approximately 10 meters or 30 feet away from the receiver. However, obstacles like walls and interference may decrease this range.
End Note
Pairing a Dell wireless keyboard with its receiver is quick and straightforward. Following the step-by-step guide ensures proper pairing. Troubleshooting tips help resolve any connectivity issues. With the keyboard and receiver paired, you can experience the convenience of a cable-free workspace.