[Explored] How to Convert Wireless Keyboard into Wired Keyboard?
Wireless technology has become a ubiquitous part of our daily lives, including in the realm of computer peripherals. However, there are situations where you might want to convert your wireless keyboard into a wired keyboard. In this article, we’ll explore why someone might want to do this, discuss the advantages and disadvantages of making the conversion, provide a step-by-step guide on how to do it, and address some common FAQs.

Why Should You Convert a Wireless Keyboard Into a Wired One?
Before delving into the technical aspects, it’s essential to understand the reasons someone might consider converting a wireless keyboard into a wired one.
1. Stable Connection
Wireless keyboards rely on radio signals to communicate with your computer. While wireless technology has improved significantly in recent years, there can still be occasional interference or signal drops. Converting to a wired connection eliminates this concern, ensuring a stable and uninterrupted typing experience.
2. Battery Concerns
Wireless keyboards typically require batteries to function. Over time, you may find yourself constantly replacing or recharging batteries, which can be inconvenient. A wired setup eliminates the need for batteries, offering a hassle-free typing experience.
3. Compatibility
In some cases, a wired connection might be necessary due to compatibility issues with certain devices or operating systems. If you encounter difficulties getting your wireless keyboard to work with a specific system, converting it to wired mode could be the solution.
4. Gaming and Low Latency
Gamers often prefer wired peripherals due to lower latency. While this may not be a concern for most users, converting your wireless keyboard to wired mode can be advantageous if you’re a gamer seeking the best possible response times.
How to Convert a Wireless Keyboard into a Wired Keyboard?
Now, let’s get into the practical steps of converting your wireless keyboard into a wired one. Please note that this process may vary depending on your keyboard model and manufacturer.
Step 1: Check Compatibility
Before attempting to convert your keyboard, make sure it has a USB port for a wired connection. Some wireless keyboards lack this feature and are designed exclusively for wireless use.
Step 2: Gather Materials
You’ll need the following materials:
- Your wireless keyboard
- A USB cable (USB-A to USB-B or USB-C, depending on the keyboard’s port)
- Optional: Required drivers or firmware updates (check the manufacturer’s website)
Step 3: Connect via USB Cable
Locate the USB port on your wireless keyboard. It may be a mini USB, micro USB, USB-C, or another type.
Plug one end of the USB cable into an available USB port on your computer.
Plug the other end of the USB cable into the keyboard’s USB port (if it has one).
Step 4: Install Drivers (if necessary)
Depending on your keyboard model and operating system, you may need to install drivers or firmware updates. Visit the manufacturer’s website for guidance on this step.
Step 5: Switch to Wired Mode (if applicable)
Some wireless keyboards have a physical switch or button to toggle between wired and wireless modes. Refer to your keyboard’s manual to determine if this feature is available, and if so, switch it to the wired mode.
Step 6: Test the Keyboard
After completing the physical connection and any required software adjustments, test the keyboard to ensure it works as expected.
How to Do It Manually by Soldering a USB Cable to the Keyboard IC
Alternative DIY Method
If the previous method won’t work for you, you can take a more advanced approach by manually soldering a USB cable to the keyboard’s internal circuitry. This method requires technical skill and carries some risks, so proceed with caution and at your own risk.
Materials and Tools Needed
- Wireless Keyboard: The keyboard you want to convert.
- USB Cable: A USB-A to USB-B or USB-C cable.
- Soldering Iron: To solder the connections.
- Solder and Flux: For secure electrical connections.
- Heat Shrink Tubing or Electrical Tape: To insulate the soldered connections.
- Wire Strippers and Cutters: To prepare the USB cable and wires.
- Screwdriver Set: To disassemble the keyboard (if required).
- Multimeter (Optional): For testing and troubleshooting.
Now lets start with the procedure.
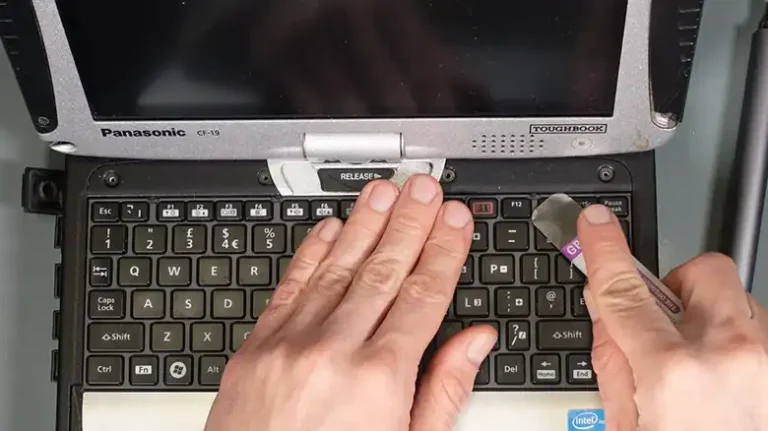
Disassemble the Keyboard
If your keyboard is not already openable, carefully remove any screws and open the keyboard casing to access the internal components. Be cautious not to damage any components during this process.
Locate the Keyboard IC
Identify the circuit board and find the connection points where the wireless module communicates with the keyboard’s main controller, typically an IC (Integrated Circuit).
Prepare the USB Cable
- Cut the USB cable to the desired length, leaving enough slack to connect it to the keyboard.
- Strip the outer insulation of the USB cable to expose the individual wires (usually red for power, black for ground, white and green for data).
Identify the Connection Points
- Using your technical skills or referring to the keyboard’s schematic (if available), identify the correct points on the keyboard’s circuitry where the USB wires will be soldered.
- Typically, you’ll need to identify the points for power (VCC), ground (GND), data+ (D+), and data- (D-).
Solder the Connections
- Carefully solder the USB cable wires to their corresponding connection points on the keyboard’s circuit board.
- Ensure secure and neat solder joints, avoiding any short circuits or cold solder joints.
- Use flux to enhance solder flow and adhesion.
Insulate the Connections
- Once the solder joints have cooled, insulate each connection with heat shrink tubing or electrical tape to prevent shorts.
- Be thorough in insulating each wire individually.
Reassemble the Keyboard
Put the keyboard back together, ensuring all components are properly aligned and secured.
Test the Wired Keyboard
Plug the USB end of the cable into your computer and test the keyboard’s functionality. Ensure all keys work correctly and that there are no issues with the wired connection.
Secure the Cable
Find a suitable way to secure the USB cable to the keyboard, such as by adding cable clips or routing it through existing openings in the keyboard’s casing.
Perform Final Checks
Use a multimeter to check for continuity and proper electrical connections. Troubleshoot and re-solder any problematic areas if necessary.
Note: if you don’t have access to a soldering gun, or aren’t comfortable using one, you can also use a glue gun to hold the black and red cables to the keyboard IC.
Disadvantages of Converting to a Wired Keyboard
While there are notable advantages to converting a wireless keyboard into a wired one, it’s essential to consider potential drawbacks as well.
Reduced Mobility
One of the primary benefits of wireless peripherals is increased mobility. Converting to a wired setup restricts your keyboard to the length of the USB cable, limiting your ability to move it freely.
Aesthetics
Wires can clutter your workspace and detract from the clean and minimalist look that wireless setups offer. This aesthetic concern might be particularly relevant for those who prioritize a tidy desk.
Potential Damage to USB Port
Frequent plugging and unplugging of the USB cable can put strain on the keyboard’s USB port, potentially causing damage over time. This risk is higher if the keyboard was not initially designed for a wired connection.
FAQs
Can I convert any wireless keyboard into a wired one?
Not all wireless keyboards can be converted to wired mode, as it depends on the keyboard’s design. Check if your keyboard has a USB port before attempting the conversion.
What if my wireless keyboard doesn’t have a USB port?
If your wireless keyboard lacks a USB port, it cannot be converted into a wired keyboard using the first method. Use the alternative method instead.
Does converting to a wired keyboard improve gaming performance?
Converting to a wired keyboard can reduce latency, making it a better choice for gaming, especially in competitive scenarios where every millisecond counts.
Will I need special drivers for my keyboard?
Depending on your keyboard model and operating system, you may need to install drivers or firmware updates. Check the manufacturer’s website for guidance.
Summing it Up
Converting a wireless keyboard into a wired one can be a practical solution for those seeking a stable connection, freedom from battery concerns, and improved compatibility. However, it’s essential to consider the potential drawbacks, such as reduced mobility and aesthetics. Before attempting the conversion, ensure that your keyboard is compatible and follow the provided steps carefully. Ultimately, the decision to go wired or wireless depends on your specific needs and preferences.