How to Turn on Lenovo Essential Wireless Keyboard? Quick Guide
Turning on a Lenovo Essential wireless keyboard can seem difficult at first. With most gadgets today, the user manual tends to be overlooked, leaving many fumbling to get their devices working. But there isn’t anything to worry about as powering up a Lenovo keyboard is simple.
In most cases, To turn on a Lenovo Essential wireless keyboard, press and hold the power button located on the top right edge of the keyboard until the status light turns on. This indicates the keyboard is powered on and ready to pair.
This guide will walk you through the basic steps to get your wireless keyboard up and operational in no time.
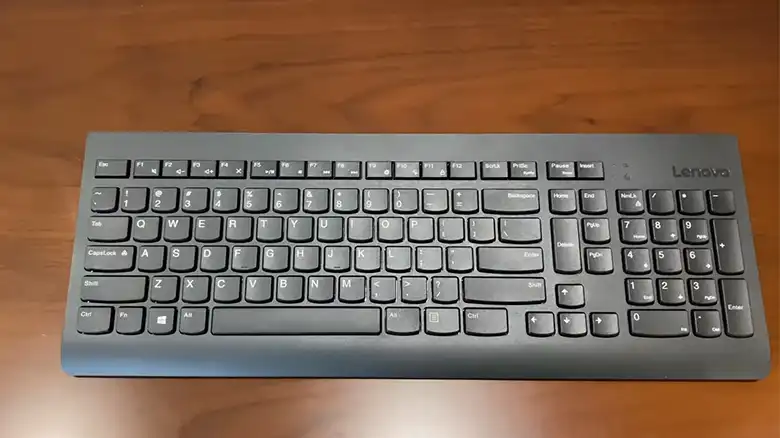
Does the Keyboard Follow the Same Turning on Procedure?
While most Lenovo wireless keyboards power on the same way, there can be slight variations depending on the specific model. However, the general process remains relatively consistent across their lineup of Essential wireless keyboards.
The most common method relies on a wireless USB dongle that connects to your computer. The keyboard has a tiny nano receiver stored in the battery compartment or on the underside. You are turning on the keyboard powers on this receiver to connect to your PC via the dongle.
Some models may also use Bluetooth instead of a USB receiver. For these, you will need to pair the keyboard to your computer’s Bluetooth before use. Lenovo keyboards with backlit keys may also have a physical power switch that turns the backlighting on and off.
Steps for Turning on Lenovo Essential Wireless Keyboard
Follow these simple steps to get your Lenovo Essential wireless keyboard powered up and ready to use –
1. Insert the Batteries
Your keyboard won’t power on unless it has batteries installed. Locate the battery compartment on the underside of the keyboard. Slide or pop it open to access the battery bay. Insert the required batteries, whether AAA or coin cell, matching the polarity markings. Alkaline batteries are best, or you can use rechargeable NiMH batteries.
2. Plug in the Wireless USB Dongle
Find the tiny wireless nano receiver stored within the mouse’s battery compartment or underside. Plug this into an open USB port on your computer. This allows wireless communication between the keyboard and your PC.
3. Insert the USB Dongle
Now, you will need to connect the USB dongle to the USB port of your PC and wait till you see the Battery indicator stay solid for three seconds. It means the keyboard is turned and ready for use.
Bonus Tips – (Troubleshooting)
Have trouble getting your Lenovo wireless keyboard to power on? Here are some quick troubleshooting tips –
- Check that fresh batteries are correctly installed in the battery bay. Alkaline or rechargeable NiMH batteries work best.
- Make sure the wireless nano receiver is firmly plugged into a working USB port on your computer. Try different ports if needed.
- Press and hold the Connect button for 5+ seconds to force a reconnection attempt.
- If using Bluetooth, ensure keyboard pairing mode is active on your computer before trying to connect.
- Look for flashing LED lights or error sounds that can indicate connection issues.
- Try removing batteries and dongle, restarting your computer, and reattempting the setup process.
- Update your computer’s drivers, especially Bluetooth, USB, and input device drivers if connection problems persist.
- Refer to the user manual for troubleshooting help specific to your Lenovo model.
With a few simple steps, getting your Lenovo Essential wireless keyboard powered on and connected is quick and painless. Just be sure to have fresh batteries, plug in the USB dongle, press the Connect button, and wait for the successful connection notification. If you run into any hiccups, the tips above should help get you up and running quickly.
![[Fixed] Magic Keyboard Key Stuck Down](https://keyboardhunter.com/wp-content/uploads/2023/09/magic-keyboard-key-stuck-down-768x431.webp)